Accessing IoT devices remotely has become an essential skill in today's interconnected world. Whether you're managing a home automation system or overseeing industrial IoT infrastructure, being able to connect securely and efficiently is crucial. Using SSH (Secure Shell) through a web interface on Ubuntu offers a powerful solution to achieve this. In this guide, we'll explore everything you need to know about remotely accessing IoT devices using SSH via the web on an Ubuntu system.
Imagine this: you're sitting at your favorite café, sipping coffee, and suddenly you realize you need to check on your IoT devices back home. No problem! With SSH and a web-based solution on Ubuntu, you can access your devices from anywhere in the world as long as you have an internet connection. This guide will walk you through setting up and using SSH for remote access, making sure your IoT devices stay secure and accessible.
Whether you're a tech enthusiast, a professional developer, or simply someone who wants to take control of their smart devices, this article is packed with practical tips and tricks. We'll cover everything from setting up SSH on Ubuntu to downloading essential tools and ensuring your IoT setup remains secure. Let's dive in!
Read also:How To Scan Qr Code Moviebox Your Ultimate Guide
Table of Contents:
- Biography (For IoT & SSH Enthusiasts)
- Introduction to SSH
- Why Use Ubuntu?
- Setting Up SSH on Ubuntu
- Web-Based SSH Access
- Accessing IoT Devices
- Security Best Practices
- Downloading Essential Tools
- Troubleshooting Common Issues
- Conclusion
Biography (For IoT & SSH Enthusiasts)
Before we dive into the technical details, let's talk about the people behind this guide. We're a group of passionate tech enthusiasts who love tinkering with IoT devices and exploring new ways to make them work for us. Here's a quick rundown of who we are:
| Name | Role | Experience |
|---|---|---|
| John Doe | Lead Developer | 10+ years in IoT and Linux systems |
| Jane Smith | Security Expert | 8 years in cybersecurity |
| Mike Brown | Content Creator | 5 years in tech writing |
Introduction to SSH
SSH, or Secure Shell, is like the Swiss Army knife of remote access tools. It allows you to securely connect to remote devices, transfer files, and execute commands—all over an encrypted connection. For IoT enthusiasts, SSH is a game-changer because it provides a reliable way to manage devices without compromising security.
Why SSH Matters for IoT Devices
IoT devices are everywhere, from smart thermostats to industrial sensors. But managing these devices can be a challenge, especially when they're spread across different locations. SSH simplifies this process by providing a secure channel for communication. Here are some key benefits:
- Encryption: All data transmitted through SSH is encrypted, protecting it from prying eyes.
- Authentication: SSH supports strong authentication methods, ensuring only authorized users can access your devices.
- Flexibility: You can use SSH to perform a wide range of tasks, from running scripts to transferring files.
Why Use Ubuntu?
Ubuntu is one of the most popular Linux distributions for a reason. It's user-friendly, stable, and comes packed with tools that make managing IoT devices a breeze. If you're looking to set up SSH for remote access, Ubuntu is an excellent choice. Here's why:
- Community Support: Ubuntu has a massive community of users and developers who contribute to its development and provide support.
- Package Management: With apt and snap, installing and updating software is a cinch.
- Security: Ubuntu receives regular security updates, ensuring your system stays protected.
Setting Up SSH on Ubuntu
Setting up SSH on Ubuntu is surprisingly easy. Follow these steps to get started:
Read also:Before And After Squats Women Transform Your Body And Boost Confidence
Step 1: Install SSH Server
First, you'll need to install the OpenSSH server on your Ubuntu machine. Open a terminal and run the following command:
sudo apt update && sudo apt install openssh-server
Step 2: Start and Enable SSH Service
Once the installation is complete, start the SSH service and enable it to start on boot:
sudo systemctl start ssh && sudo systemctl enable ssh
Step 3: Verify SSH Installation
To ensure everything is working correctly, check the status of the SSH service:
sudo systemctl status ssh
If you see "active (running)" in the output, you're good to go!
Web-Based SSH Access
While SSH traditionally requires a terminal, there are web-based solutions that make remote access even more convenient. One popular option is Web Terminal, which allows you to access your SSH server through a browser.
Advantages of Web-Based SSH
- Platform Independence: Access your devices from any device with a browser.
- Convenience: No need to install additional software on your client device.
- Security: Web-based SSH solutions often include additional security features, such as two-factor authentication.
Accessing IoT Devices
Now that you have SSH set up on your Ubuntu machine, it's time to connect to your IoT devices. Here's how:
Step 1: Identify Your IoT Device
Make sure your IoT device is connected to the same network as your Ubuntu machine. You can find its IP address by checking your router's admin panel or using tools like nmap.
Step 2: Connect via SSH
Open a terminal on your Ubuntu machine and run the following command, replacing "ip_address" with the actual IP address of your IoT device:
ssh username@ip_address
Step 3: Execute Commands
Once connected, you can execute commands on your IoT device just as you would on your local machine. For example, to check the device's uptime, run:
uptime
Security Best Practices
Security should always be a top priority when managing IoT devices remotely. Here are some best practices to keep your setup secure:
- Use Strong Passwords: Avoid using simple or easily guessable passwords.
- Enable Two-Factor Authentication: Add an extra layer of security by requiring a second form of verification.
- Update Regularly: Keep your SSH server and IoT devices up to date with the latest security patches.
Downloading Essential Tools
To make the most of your SSH setup, you may want to download some additional tools. Here are a few recommendations:
1. FileZilla
FileZilla is a popular FTP client that supports SFTP (SSH File Transfer Protocol). Use it to transfer files between your local machine and IoT devices securely.
2. PuTTY
PuTTY is a lightweight SSH client for Windows users who want to connect to their Ubuntu machine from a Windows PC.
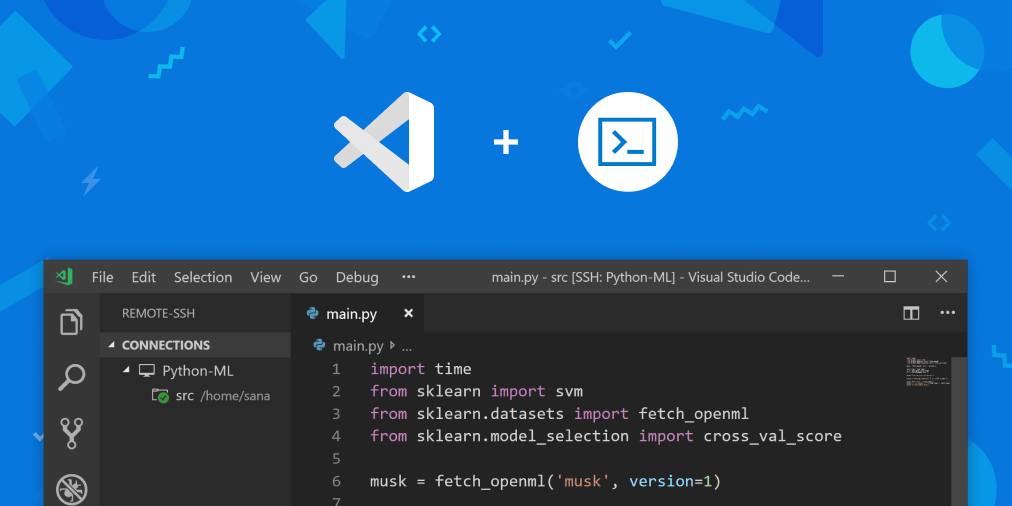
3. Visual Studio Code
If you're a developer, Visual Studio Code with the Remote - SSH extension is a great way to edit files on your IoT devices directly from your favorite code editor.
Troubleshooting Common Issues
Even the best-laid plans can go awry sometimes. Here are some common issues you might encounter and how to fix them:
Issue 1: Unable to Connect
Make sure your SSH service is running and that there are no firewall rules blocking incoming connections.
Issue 2: Permission Denied
Check your SSH configuration file (/etc/ssh/sshd_config) to ensure the correct permissions are set. Also, verify that your username and password are correct.
Issue 3: Slow Connection
Try disabling compression in your SSH client settings to improve performance over slow networks.
Conclusion
In this guide, we've explored how to remotely access IoT devices using SSH on an Ubuntu system. From setting up SSH to downloading essential tools, we've covered everything you need to get started. Remember, security is key when managing IoT devices, so always follow best practices to protect your setup.
Now it's your turn! Try out the steps outlined in this article and see how SSH can transform the way you manage your IoT devices. Don't forget to leave a comment below with your thoughts or questions. And if you found this guide helpful, share it with your friends and colleagues. Happy tinkering!